Food

I love quick and easy recipes! If you have pre-baked/pre-cooked pumpkin, this will take you literally 10 minutes. Not that you can’t use a canned pumpkin, but in my opinion, nothing compares to the real one in taste. I just don’t like the canned a lot. One thing to make my job easier as far…
Read More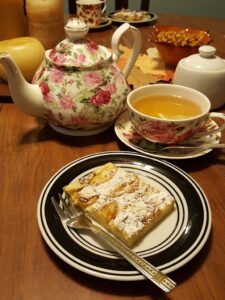
I have a ton of recipes for crepes and I love them but as far as American pancakes go, I love King Arthur’s Gluten Free Pancake mix. I tried many that I mixed the flours for but none I like better than this mix. If you haven’t used it before, I highly recommend it.I have…
Read More
I have posted previously the basic recipe how to make maki sushi so I won’t re-post again but feel free to check it out. In any case, I wanted to try some new variations and they came out pretty neat. For example, I always made rolls that were with sushi nori on the outside. This…
Read More
I don’t usually do video and today was completely unplanned but I was so excited to share this amazing recipe! I did publish the Coconut crepes recipe before and it is indeed a delicious one, but this is so much closer to texture and taste to the real crepes, that I can absolutely honestly say,…
Read More
I love crepes and I was really bummed that I couldn’t find a good gluten free recipe. I tied many different ones, but after a bit of experimenting, I think this is the best, easiest and most delicious recipe I’ve tried. The subtle coconut flavor makes it that much better. By the way, the taste…
Read More
Christmas baking this year was very rushed.Aside from working on Dec 24th, I had no plans to bake cookies at all, because I still had to make the traditional Bulgarian odd number dishes for Christmas. Yes, I had no plans, but my daughter did. 🙂 She fluttered her long eyelashes and gave me the…
Read More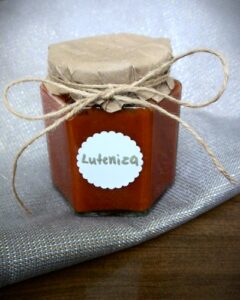
One of my most vivid childhood memories is of my family making Luteniza. The whole family ( parents, grandparents, cousins, aunts, uncles and more) gets together, everyone participates and the amounts of the spread that are made are enough to make a canning factory jealous. Even though it was a hard work for a young…
Read More
I adore artichokes and one of my favorite ways to have them is in artichoke dip. Since my ulcers and gallbladder problems came along, I haven’t been able to try it at all. Of course these two problems are the reason I switched on gluten free diet and I am happy to report that…
Read MoreWhen I first went gluten free I was trying to come to terms with the fact that some snacks I used to enjoy will just be off limits from now on. Goodbye pretzels! So long yummy cheesy puffs! Sigh… But the more I got into gluten free things, the more I discovered that not only I…
Read More
Long story short- I can’t eat gluten. Not that I don’t want to but I shouldn’t for medical reasons. When I found out, I was literally devastated and scared. How the heck will I survive?! I could live on bread! I’ve always joked that working in a cake shop is not a temptation for me.…
Read More